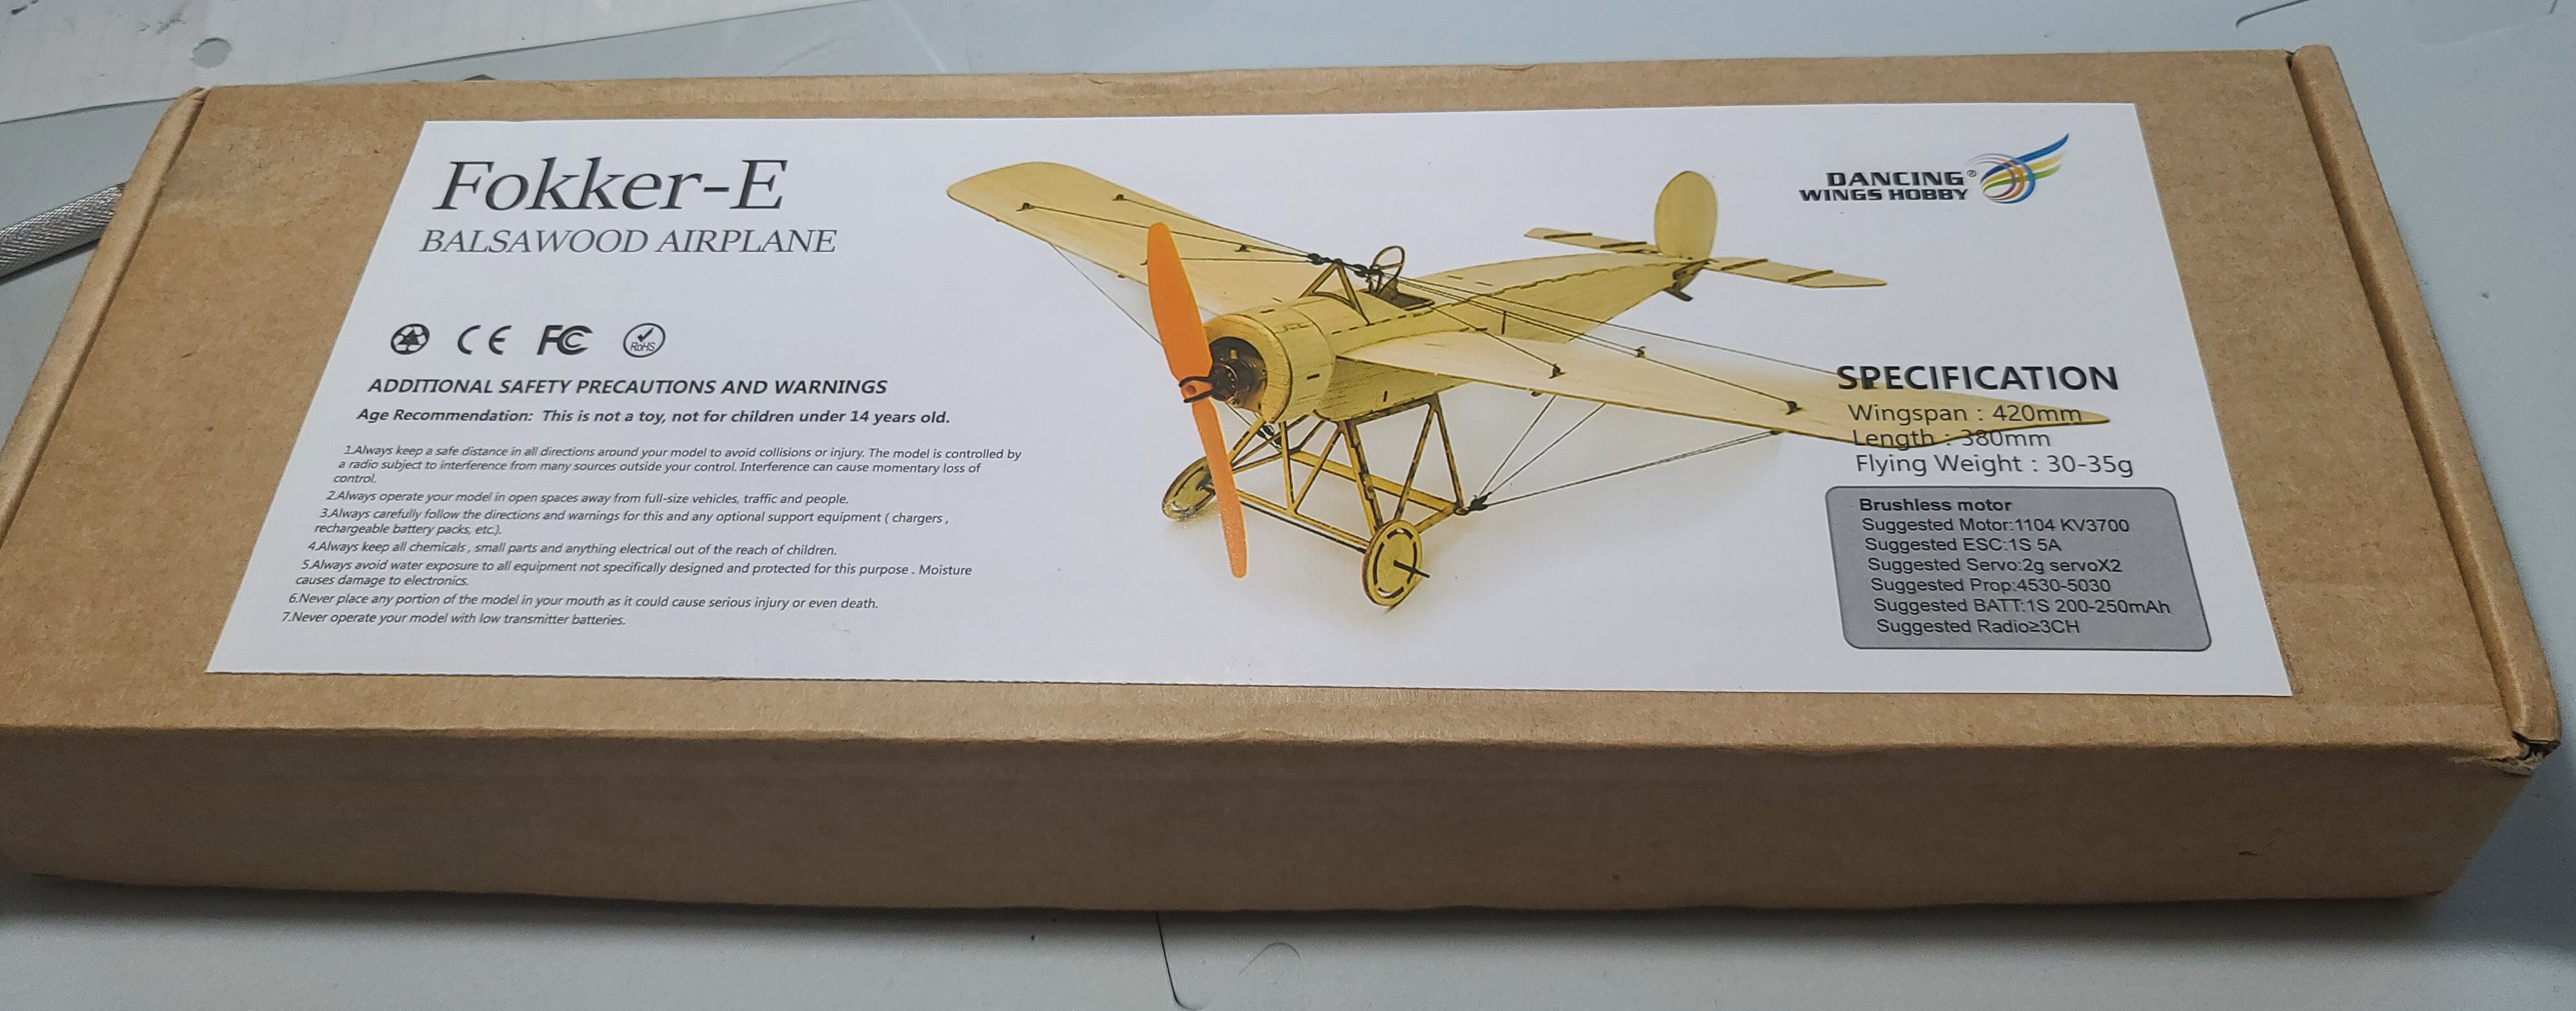
When I built the Dancing Wings Hobby Fokker-E (the small 420 mm wingspan version), I learned a lot of very interesting things. Well, I find them interesting. So I thought I would share them in case anyone else finds them interesting or even helpful.
Instructions
The instructions are cryptic. A single page with lots of colour pictures and some limited and very tiny writing. I needed a magnifying glass to make sure I didn’t miss important details. There are lots of comments about the instructions from buyers, so I think others have the same problem I did.
You have to read and follow the instructions very, very carefully. I missed one piece, which I didn’t find before it was too late, simply by failing to notice the tiny label on a one of the picture steps.
The instructions also don’t include what you might think is very basic information. Glue is a good example. They don’t say anything about glue. I mostly used standard white wood glue, but sometimes Superglue (CA some people call it). For example I glued in the magnets using Superglue. I guess I made reasonable assumptions, and I think I got it right, but nothing – absolutely nothing in the instructions about what glue to use and where it should be used.
Electronics
There is very little information in the instructions about electronics. The kit I ordered included a brushless motor, but the instructions which described how to install it described a different one, so I had to “figure it out”. There was nothing about how to install an ESC, receiver or servos.
The instructions do say which electronics to buy – but nothing about how to install them.
Youtube Video
There is a Youtube Video! This was a great find, and very, very helpful. There is an animated video from Dancing Wings Hobby, that kind of shows how to put the kit together. Again it doesn’t mention basics like glue, but it does show the order very well, and even gave some additional hints about installing the electronics that you don’t get in the printed instructions. I built the plane with the video open on my laptop and paused in my browser. At each next step, I would hit play, wait a couple of seconds and pause again so I could see the next step. You can find the video here:
https://www.youtube.com/watch?v=MfIsc5mL2WM
Decoration – Paint, Decals etc.
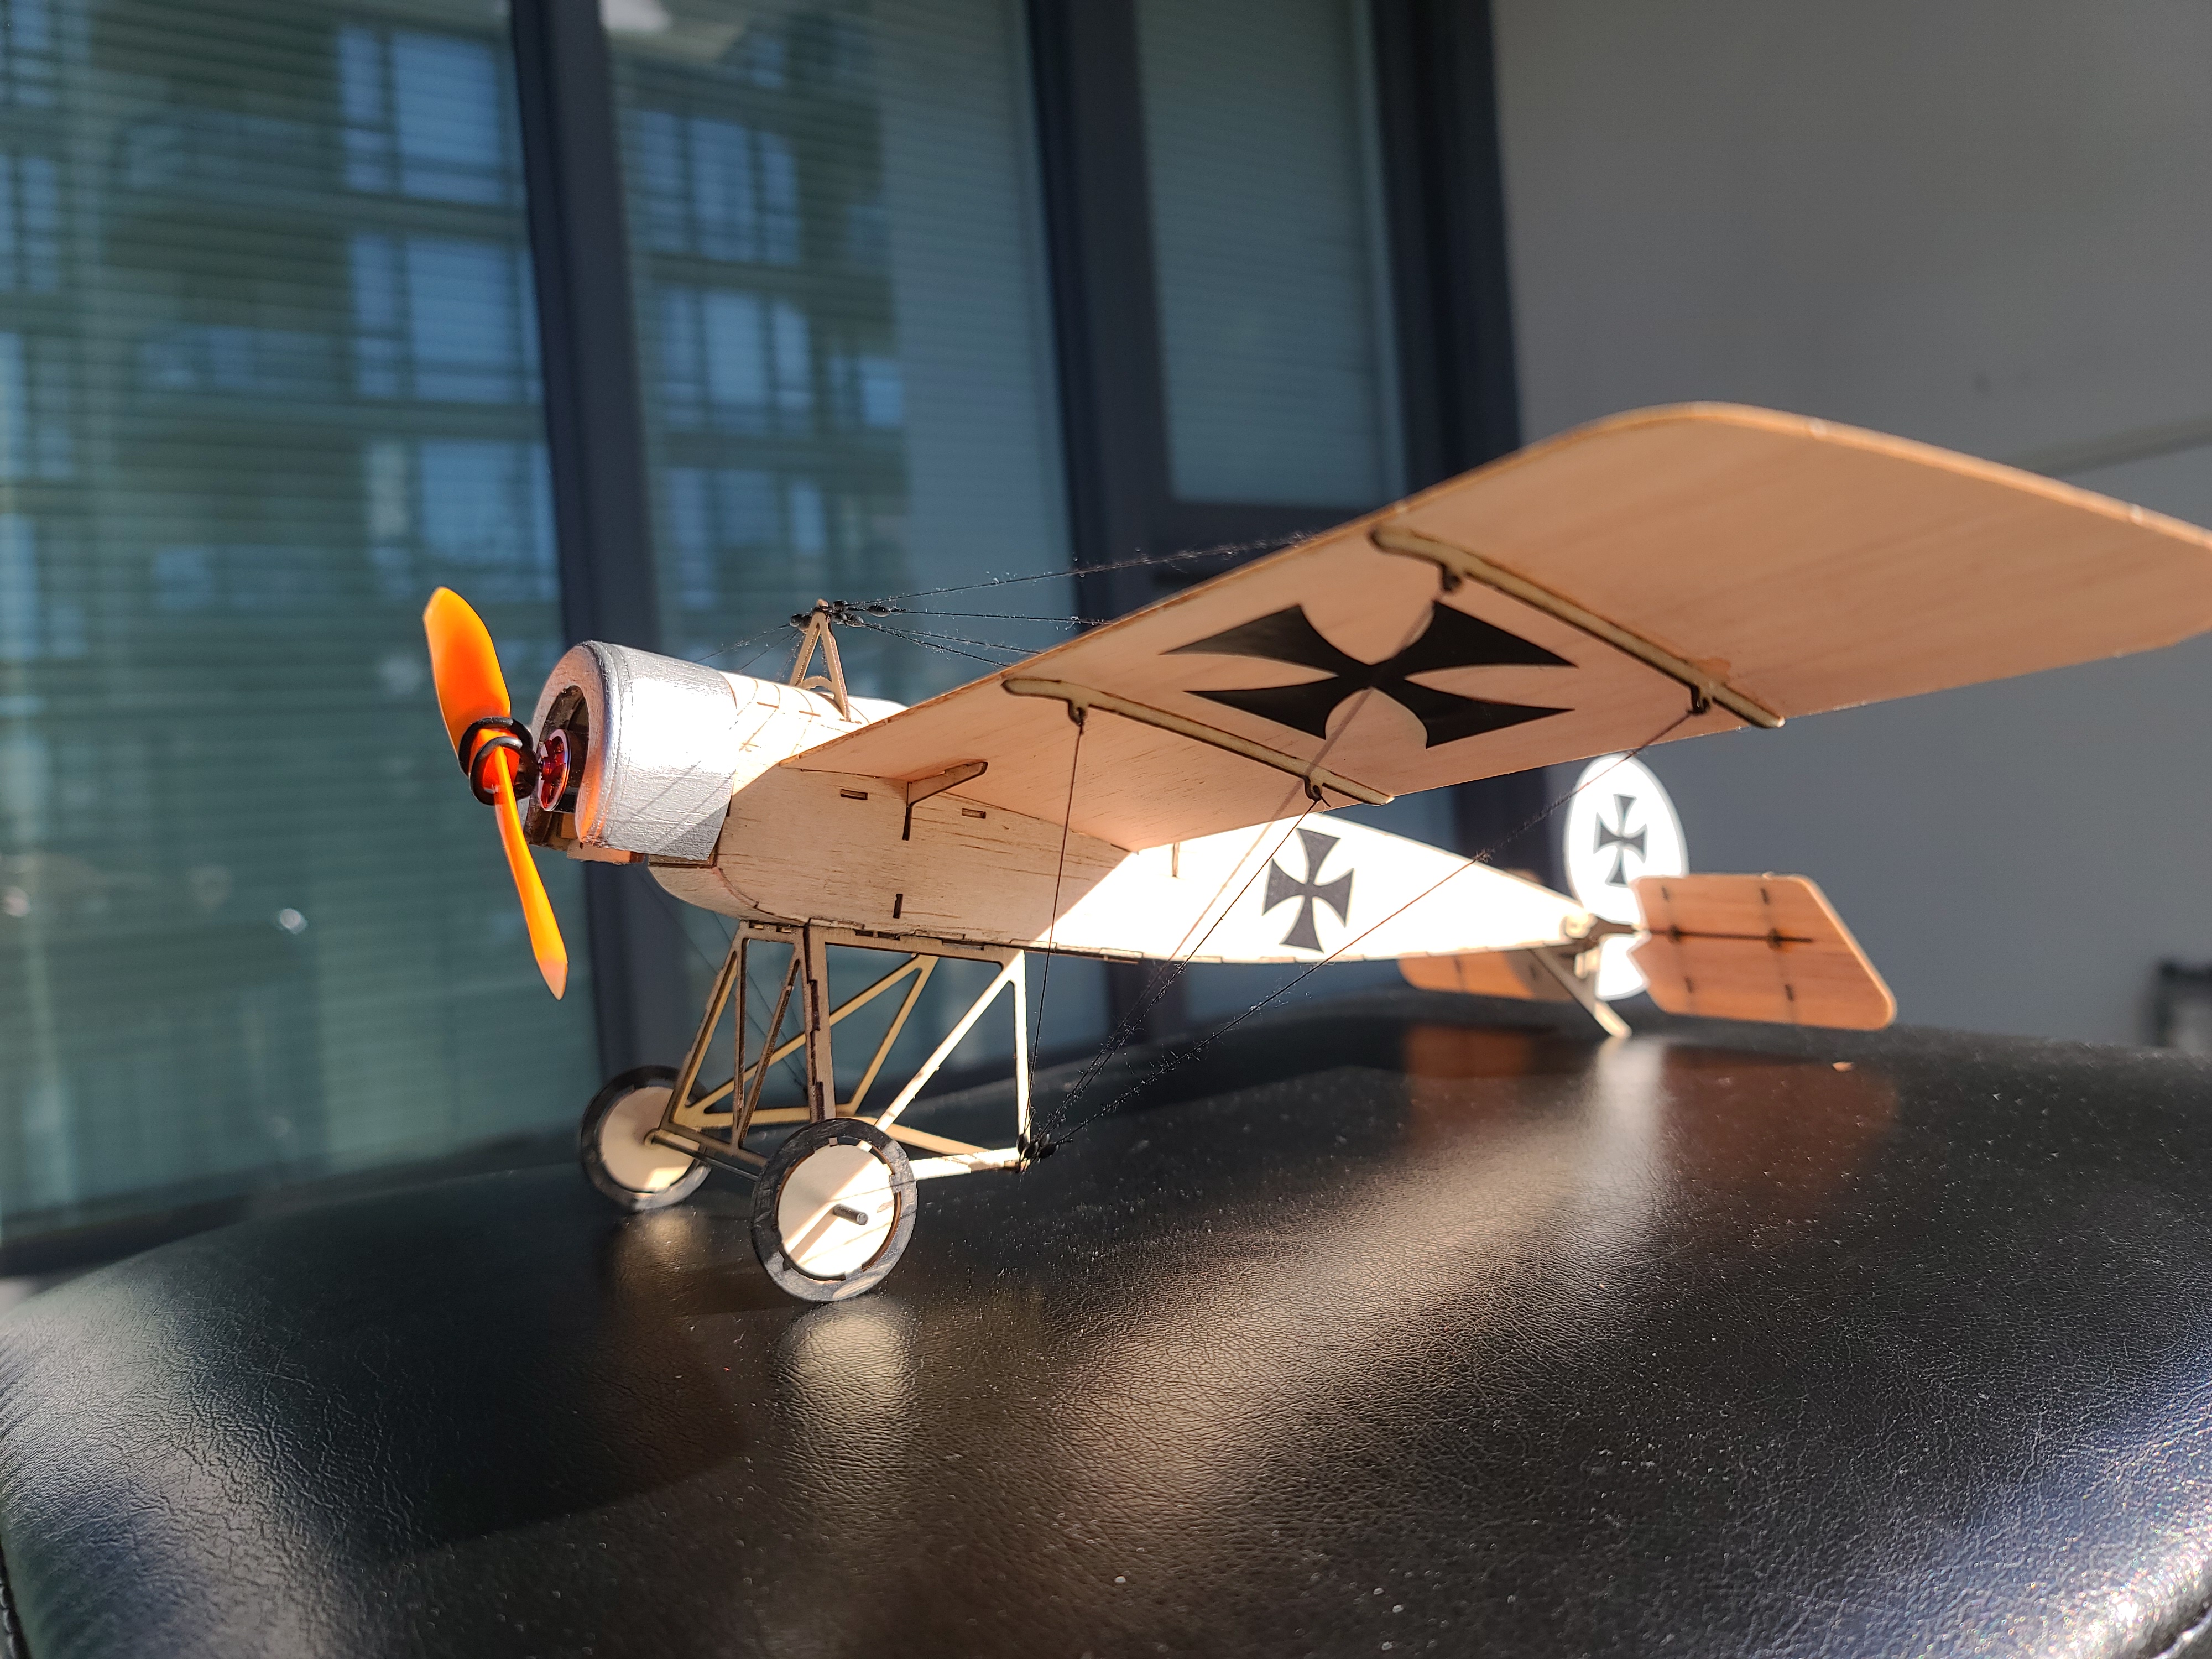
The instructions say nothing about paint or other decorations. The video does show some things like Iron Cross decals and a white rudder that are not in the instructions. They look great. So I painted the rudder white and made some iron cost decals by cutting out some Cricut black vinyl. I’m not sure if that’s what I was supposed to do (there are no decals in the kit), but I think it looks great.
After finishing and trying to paint the wheels, I realized that I should have painted them before putting them on. With all of the very fine detail, such as the rigging and struts, it’s almost impossible to paint after everything is connected, so ask yourself at each step – will I want to paint this? If so – paint it now before installing it. Some things I wish I had painted first:
- The wheels
- The landing gear
- The rudder
- The frame in front of the cockpit that holds up the rigging
- White stripes on the wings to frame the Iron crosses (see some original pictures)
- The pilot
- The railing around the cockpit
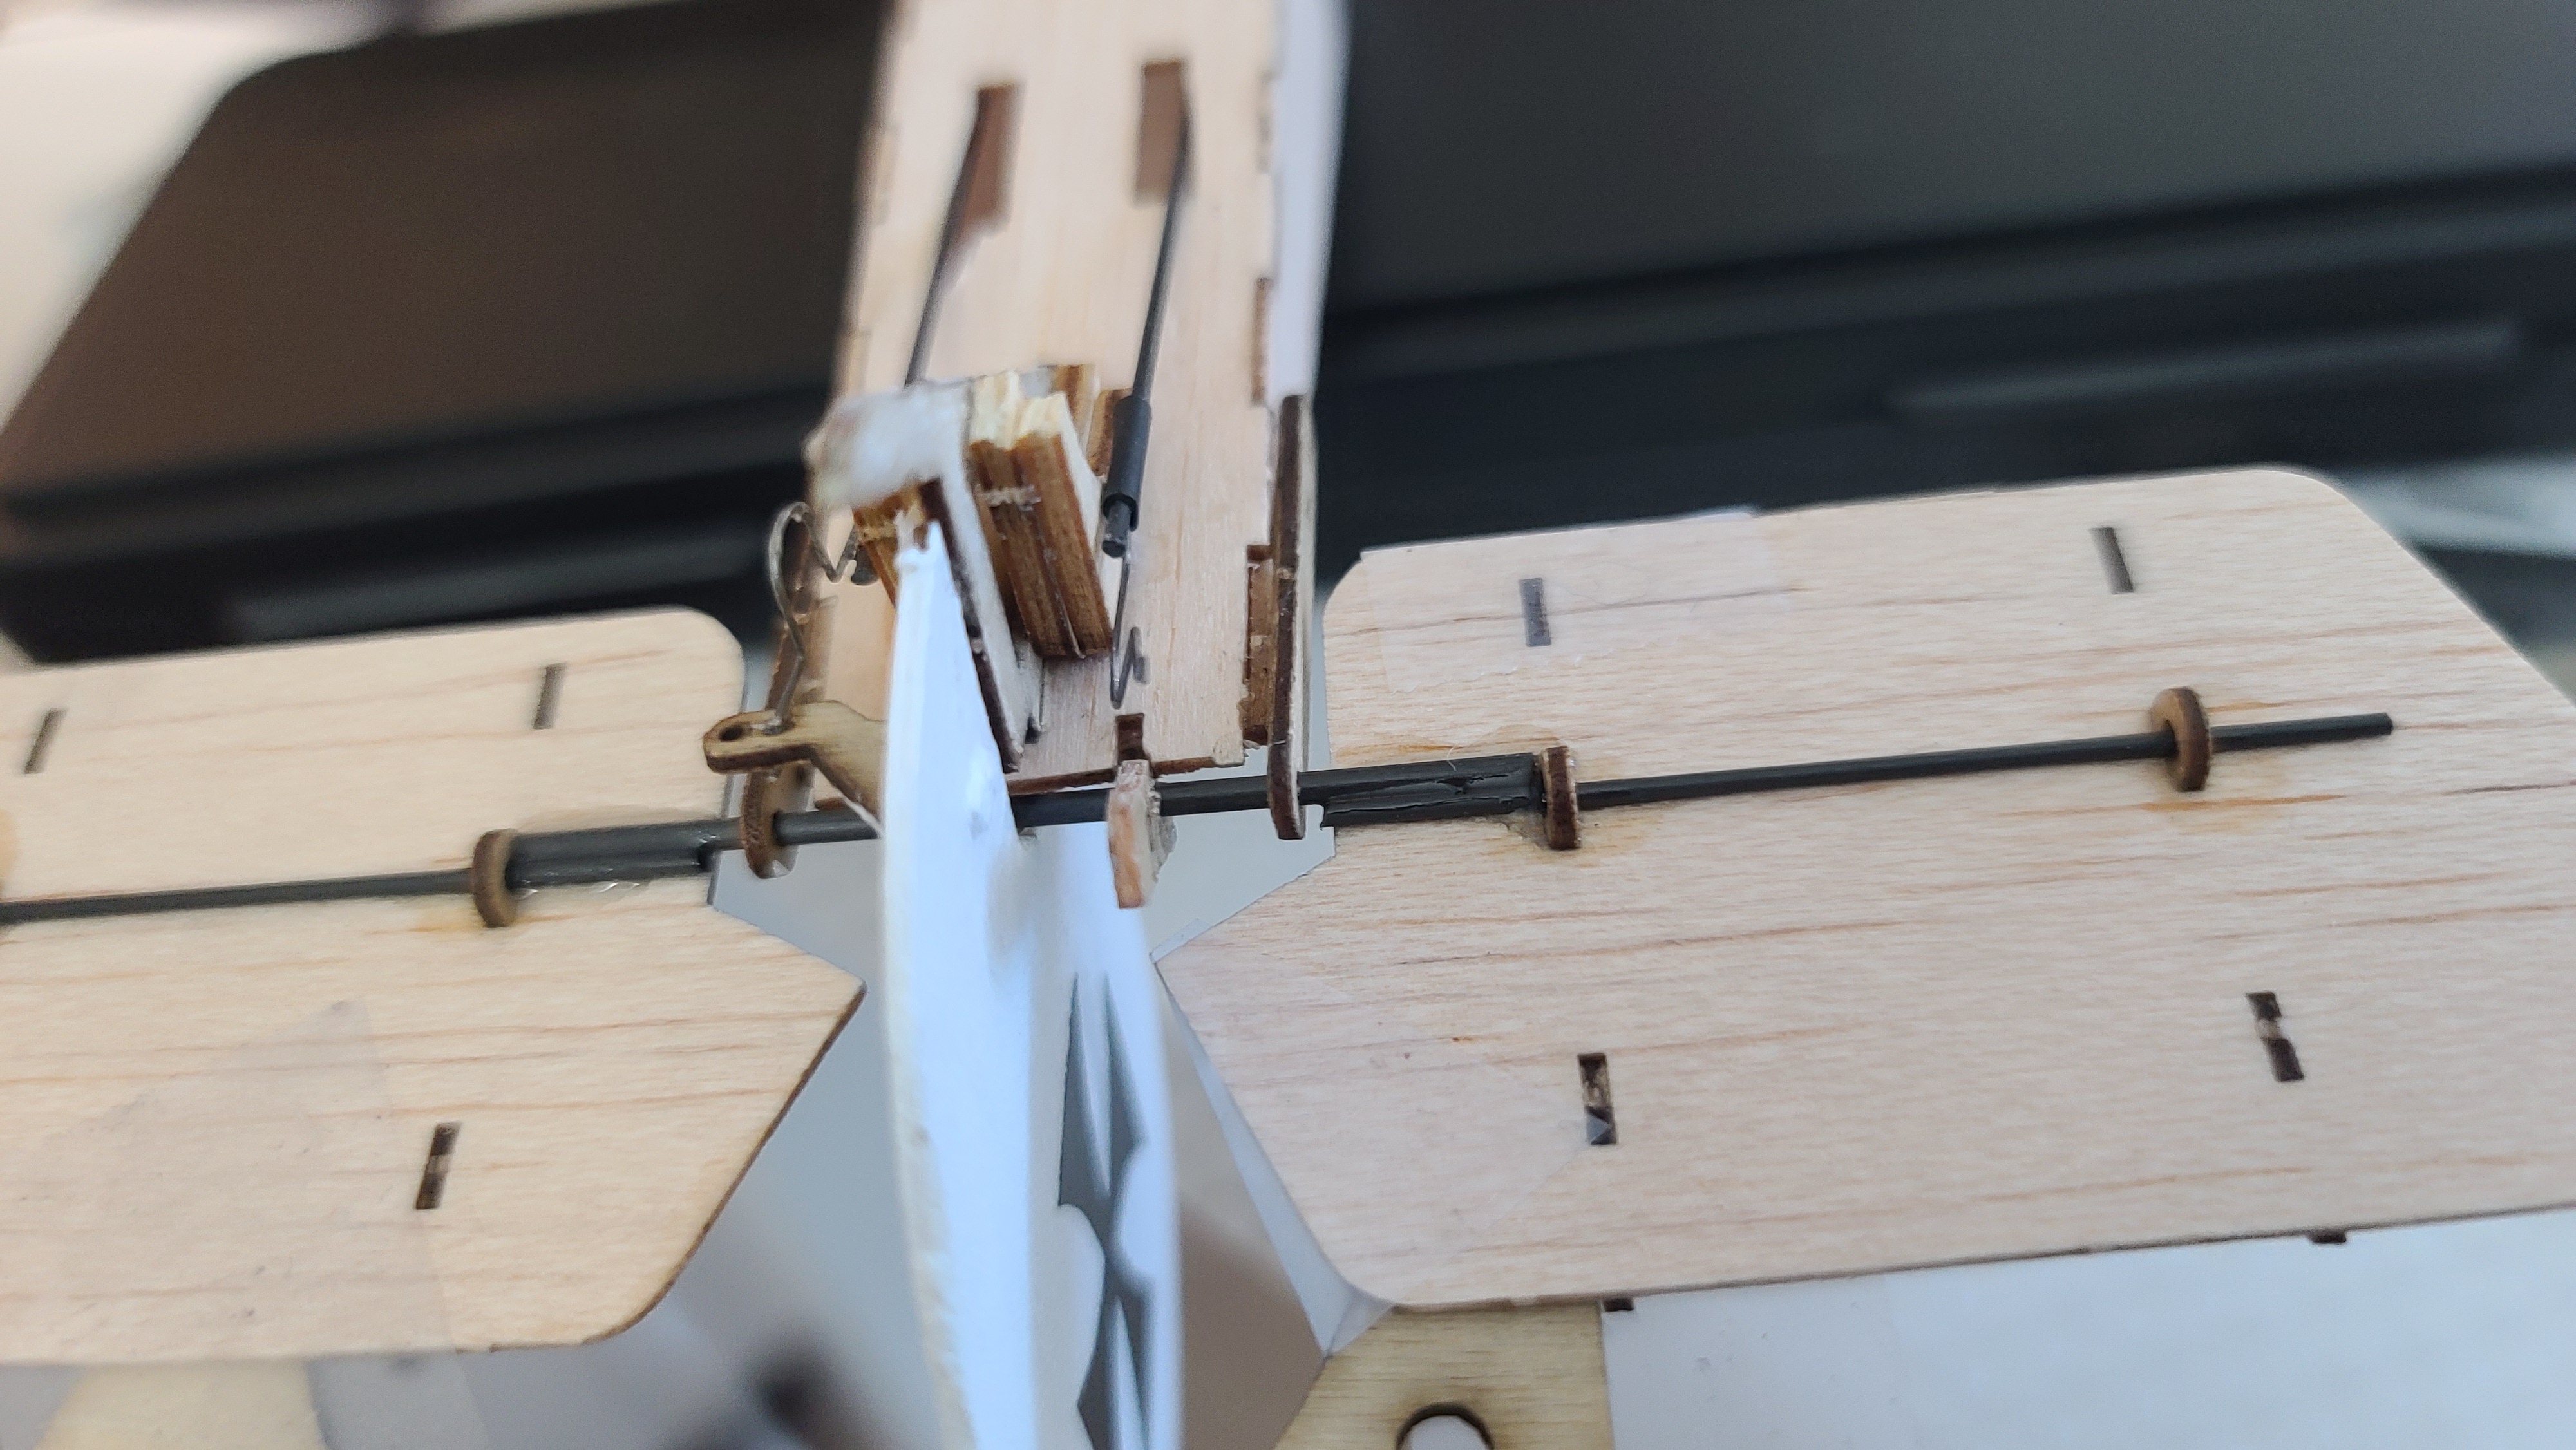
Magnets
There are several small magnets included and the instructions are very precise about where they need to be placed, but gives no hint about polarity. For example it says to put two magnets on the underside of the cowling. This is to hold the cowling in place. Then somewhere else in the build it says put two magnets on the brackets at the front of the frame that hold the cowling. If you don’t think ahead, you could install these two magnets so that when you try to put the cowling on it will bounce right out, rather than clicking into place. You need to get the polarity right for each and every one.
The thing is – the different pictures and sequences don’t really join this together, so unless you hunt down the “other end” of the magnet you are installing, you won’t know which end is which. So here is what I do:-
- Take the magnets apart in pairs.
- Mark each magnet with a ‘dot’ using a sharpie to show sides that need to be apart
- Find both sides of the magnet connection on the plans.
- Make sure to install each magnet with the dot (from step 2) away from the other magnet.
The magnets are also a bit small. I guess this is my opinion, but there are two hints that I am right. The first is that the holes in the balsa for the magnets are far too big for the magnets provided. Around half the size. So even with copious Superglue, the magnet sort of floats in the hole for it. The second hint is that when clicking things like the electronics hatch on the underside of the plane in place, the hatch seems very loose. It feels like it might drop out, the magnet isn’t holding it very tightly. I bought some larger magnets and replaced some of those that came with the kit and got a much more satisfying “click” and much more satisfying and firmer hold.
Continued …
I’m still building this model, so likely there is more to come. This is where I’m at so far:
Maiden Flight and Lessons Learned
Well it’s 7th July 2021 and this plane has flown! You can see the video on YouTube.
I learned a lot of things from building the Dancing Wings Sopwith Pup K06 and I figured out the electronics, the videos for this are also on YouTube.
I learned 3 things from the maiden flight
- The carbon fiber rod in the kit that is for the elevator is very important. This should be the thicker 1.5mm rod and I used the thiner one. I had to fix that.
- The rudder was very twitchy. I think this is because the rudder was not stable and was kind of flapping around a bit. The “paper” hinge for the rudder specified in the instructions needs to be fairly strong paper or thin plastic. I replaced the paper I had used with hinges left over from the Sopwith Pup. They are perfect – it would be great if they get included with the kit.
- Center of Gravity is very important, I had to include a lot of weight inside the cowling in addition to the lead that came with the kit. Don’t worry, getting the CG right is more important than the total weight. My model is 68g and it flies just fine.
- The plane tends to fly up and to the left. There is no down thrust or right thrust on the motor mount in this model, whereas the Sopwith Pup motor mount has a definite down/right angle to the mount. I added some packing on the motor mount to try to point the motor down and to the right.
I never expected the Spanish Inquisition! 😀